
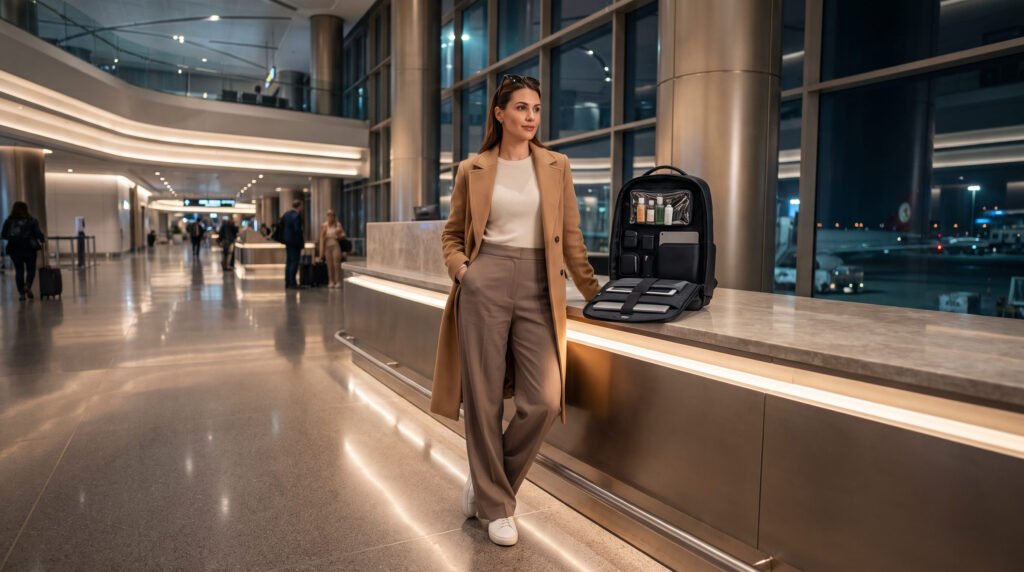
One-bag airport security becomes much easier when your carry-on is organized around the checkpoint rather than packed like a storage box. The goal is simple: keep the items you may need to access easy to reach, understand which rules apply to your screening lane, and avoid creating unnecessary repacking at the end.
For U.S. travelers, TSA procedures can vary depending on the checkpoint, screening technology, and whether you have TSA PreCheck. This guide explains how to build a practical one-bag system, organize liquids and electronics, handle batteries and medical equipment, and prepare for screening without assuming that every airport uses the same process.
The Basic One-Bag Airport Security Setup
A good security-friendly bag has three characteristics: organized, accessible, and easy to repack.
Instead of putting everything wherever it fits, divide your carry-on into functional zones:
- Top-access zone: liquids, documents, and anything you may need quickly
- Electronics zone: laptop, tablet, camera and accessories
- Main clothing zone: packing cubes and soft goods
- Bottom or protected zone: shoes and less frequently accessed items
- Small-item zone: cables, adapters and personal accessories
The objective isn’t to guarantee that nothing will need to come out. TSA procedures can differ. The objective is to make your bag easy to work with if an officer asks you to remove something.
Keep Your Security Items Together
A transparent liquids bag, laptop sleeve and travel-document pouch should have predictable locations.
If you repeatedly travel with the same bag, put these items back in the same places after every trip. Familiar organization reduces the chance of leaving something behind during a busy screening process.
Avoid Overpacking the Main Compartment
A tightly compressed backpack may technically hold more, but it becomes harder to inspect and repack.
Leave enough flexibility around electronics and other potentially removable items that you can access them without pulling half the bag apart.
What Should Go at the Top of Your Carry-On?
The top of your bag should contain items that are most likely to require attention or that you may need immediately.
A practical arrangement is:
- Travel documents and identification
- Liquids bag
- Laptop or other easily accessible electronics
- Outer layer if it is not being worn
- Everything else underneath
This isn’t a universal TSA requirement. It is an organization strategy designed to make your bag easier to manage.
If your checkpoint allows an item to remain inside, you have lost nothing by keeping your bag organized. If an officer asks you to remove it, you can reach it quickly.
How to Pack Liquids for Airport Security
Liquids are one of the most important parts of a security-friendly carry-on because the applicable screening rules can affect how you organize toiletries.
TSA’s 3-1-1 framework generally limits liquids, aerosols, gels, creams and pastes in carry-on baggage to containers of 3.4 ounces (100 milliliters) or less, with those containers placed in a single quart-size bag for each passenger. Exceptions exist for certain medically necessary liquids and other qualifying items.
Use One Dedicated Toiletry Pouch
Rather than scattering small bottles throughout your backpack, keep your qualifying liquids together.
A compact pouch also makes it easier to:
- Find toiletries
- Check container sizes
- Remove the bag if required
- Repack everything afterward
Separate Non-Liquid Toiletries
Solid toiletries can help reduce the amount of liquid you carry.
For example, depending on your personal routine, you may use solid soap, shampoo bars or other solid alternatives. This is an organizational choice rather than a requirement.
Don’t Assume Every Liquid Is Treated Identically
Medication, medically necessary liquids, baby-related items and certain other exceptions can receive different treatment from ordinary toiletries.
If you are carrying something unusual, check current TSA guidance before your trip rather than relying on a generic packing list.
What Happens to Your Laptop and Electronics?
Electronics are easier to manage when they have a dedicated location.
A laptop should ideally sit in a protective sleeve or compartment where you can remove it without unpacking clothing, shoes or toiletries.
However, whether electronics must be removed depends on the screening procedure and checkpoint instructions.
Some travelers make the mistake of assuming that because one airport allowed a laptop to remain inside the bag, every airport will do the same. That is not a safe assumption.
Build an Electronics Layer
Keep frequently screened electronics together:
- Laptop
- Tablet
- Camera
- Handheld gaming device
- Headphones
- Charging accessories
Small cables and chargers can go into an organizer so they don’t become loose objects inside the main compartment.
How to Pack Power Banks and Spare Batteries
Power banks and spare lithium batteries deserve special attention because they are subject to aviation safety rules rather than simply ordinary carry-on packing preferences.
FAA guidance states that spare lithium batteries and power banks must be carried in carry-on baggage, not checked baggage. Batteries between 101 and 160 watt-hours generally require airline approval, while batteries over 160 watt-hours are not permitted for passenger aircraft. Airlines can impose additional restrictions.
For a one-bag setup:
- Keep power banks accessible
- Protect loose battery terminals
- Never put spare lithium batteries in checked luggage
- Check the battery’s watt-hour rating when relevant
- Review your airline’s current requirements for unusual or high-capacity batteries
This is one area where packing convenience should never override the applicable safety rules.
Standard TSA Screening vs. TSA PreCheck vs. CT Checkpoints
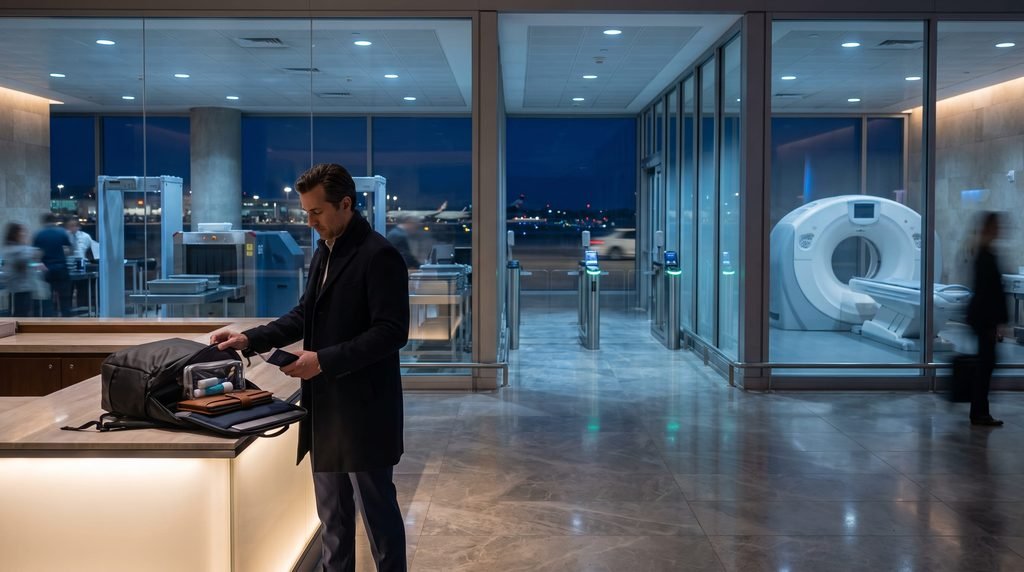
One-bag travelers should understand that there isn’t a single universal screening routine.
| Screening situation | What to expect |
|---|---|
| Standard TSA screening | Some items may need to be removed according to checkpoint instructions |
| TSA PreCheck | Eligible travelers generally have a different screening process and may leave more items packed |
| CT-enabled checkpoint | Procedures can differ; follow the instructions at that specific checkpoint |
TSA PreCheck generally allows eligible travelers to keep on shoes, belts and light jackets and leave laptops and 3-1-1 liquids in their bags, although TSA can still direct a traveler to undergo additional or different screening.
CT scanner procedures can also vary. The important rule is simple:
Don’t unpack automatically. Don’t leave something inside automatically. Follow the instructions given at your checkpoint.
What Should You Remove From Your Bag at TSA?
There is no single removal list that applies identically to every TSA checkpoint.
Your screening experience can depend on the lane, technology, TSA PreCheck status and officer instructions.
Instead of memorizing one rigid procedure, use this approach:
Before You Reach the Conveyor Belt
Have your:
- Identification ready
- Outerwear managed
- Pockets emptied when appropriate
- Liquids accessible
- Electronics organized
Then watch the instructions at the checkpoint.
During Screening
Remove only the items you are instructed to remove.
This prevents a common mistake: taking half the contents of your backpack out when the checkpoint doesn’t require it.
After Screening
Move beyond the immediate screening area before fully reorganizing whenever the airport layout allows.
Then check:
- Laptop
- Phone
- Wallet
- Passport or ID
- Liquids
- Charging equipment
- Shoes
- Jacket
A 15-second belongings check can prevent a much bigger problem later.
How to Organize a One-Bag Carry-On for TSA
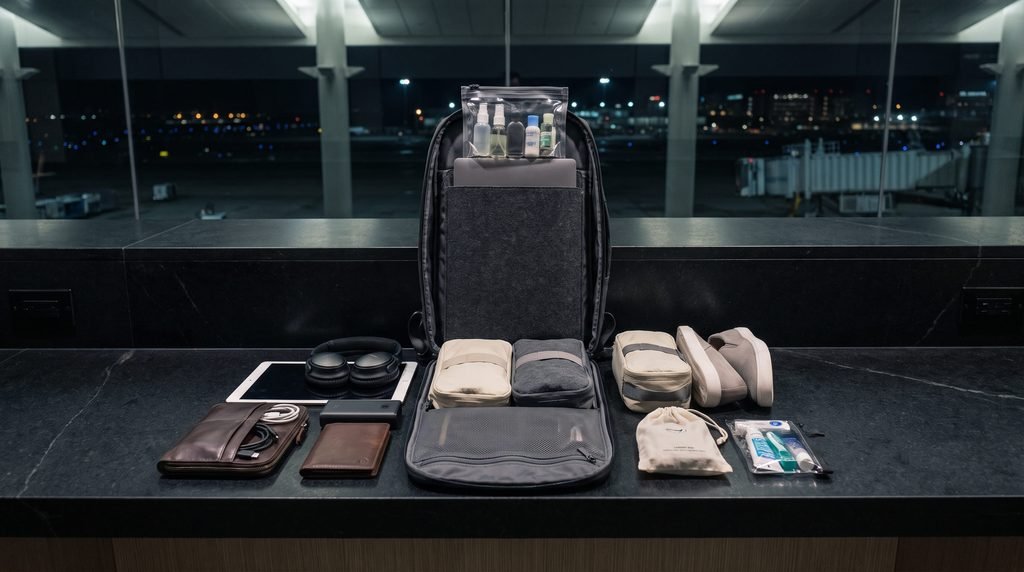
A practical one-bag layout might look like this:
Front Pocket
Use for:
- Passport or ID
- Boarding information
- Wallet
- Small travel documents
Upper Main Compartment
Place:
- Liquids pouch
- Laptop
- Tablet
- Frequently accessed electronics
Middle Section
Place:
- Clothing cubes
- Underwear
- Shirts
- Lightweight layers
Lower Section
Place:
- Shoes
- Laundry pouch
- Less frequently accessed clothing
Dedicated Electronics Organizer
Keep:
- Chargers
- Cables
- Adapters
- Memory cards
- Small accessories
The exact layout is less important than consistency. If every item has a predictable home, security becomes a simpler process.
What About Shoes, Jackets and Pockets?
Don’t build your entire packing strategy around an assumption that everyone must remove the same clothing items.
TSA’s current procedures can vary by screening circumstances, and travelers should follow the instructions at the checkpoint.
The best preparation is therefore to avoid carrying unnecessary objects in your pockets.
Before entering screening, check for:
- Coins
- Keys
- Large metal objects
- Phone
- Wallet
- Loose accessories
Keeping your pockets simple makes the screening process easier regardless of the exact lane procedure.
Carry-On Size Still Matters
Airport security and airline baggage rules are two different issues.
TSA screening determines whether your belongings can pass through security. Your airline determines whether your carry-on complies with its baggage allowance and size restrictions.
That means you should check:
- Airline
- Fare type
- Carry-on allowance
- Personal-item allowance
- Published dimensions
- Weight limits, if applicable
Don’t assume that a bag that fits one airline’s overhead-bin policy will automatically comply with another carrier’s rules.
For one-bag travel, a flexible backpack can be useful because it can adapt to different storage situations, but the bag still needs to comply with the specific airline’s current requirements.
Special Cases: CPAP, Medication and Medical Equipment
Medical and accessibility-related items should not simply be treated like ordinary travel gear.
TSA provides specific guidance for medical equipment, medications and medically necessary liquids. Travelers should review the current rules relevant to their equipment before arriving at the airport.
CPAP Equipment
A CPAP machine is medical equipment, and TSA has specific procedures for screening these devices.
If you travel with one, allow additional time and keep the equipment organized so you can respond to screening instructions without unpacking unrelated belongings.
Medication
Keep essential medication readily accessible rather than burying it beneath clothing.
For liquid medication or medically necessary liquids, check the applicable TSA guidance before departure because exemptions can apply.
Other Medical Equipment
If you use mobility equipment, assistive technology or specialized medical devices, check the relevant TSA guidance before traveling.
The safest strategy is advance preparation rather than improvisation at the checkpoint.
The One-Bag Airport Security Checklist

Before leaving for the airport, run through this short checklist:
Carry-On
- Airline baggage allowance checked
- Liquids organized
- Electronics accessible
- Power banks in carry-on
- Spare batteries protected
- Medication accessible
- Travel documents easy to reach
- Unnecessary loose items removed
- Shoes and clothing organized
- Bag not excessively overpacked
At the Checkpoint
- Follow lane-specific instructions
- Remove only what you are instructed to remove
- Keep valuables together
- Don’t rush while collecting belongings
- Check your seat-area belongings before leaving
This simple routine is more useful than trying to memorize every possible screening scenario.
Common One-Bag Airport Security Mistakes
1. Putting liquids at the bottom
If your liquids need to be removed, you may have to unpack the entire bag to reach them.
2. Burying the laptop
A laptop buried underneath clothing creates unnecessary disruption if the checkpoint asks you to remove it.
3. Mixing loose cables with clothing
Loose electronics accessories make your bag harder to inspect and repack.
4. Assuming every airport follows the same procedure
Screening technology and checkpoint instructions can vary.
5. Putting spare batteries in checked luggage
This can conflict with aviation safety requirements for spare lithium batteries.
6. Confusing TSA rules with airline rules
TSA controls security screening. Your airline controls your baggage allowance.
7. Forgetting to check your belongings afterward
The goal isn’t simply to get through the scanner. It is to leave the checkpoint with everything you brought.
Who Benefits Most From a Security-Friendly One-Bag System?
First-Time One-Bag Travelers
A predictable organization system reduces the uncertainty of deciding where everything belongs.
Frequent Flyers
Consistency becomes especially useful when you pass through different airports regularly.
Business Travelers
Keeping laptops, chargers and documents accessible can make repeated airport transitions easier.
Digital Nomads
Travelers carrying multiple electronics benefit from separating technology from clothing and toiletries.
Minimalist Travelers
A carefully organized small bag makes it easier to maintain a one-bag setup without creating a chaotic main compartment.
The Best Mindset for One-Bag Airport Security
The most useful principle is not “remove everything quickly.”
It is:
Pack so that nothing important is difficult to access.
Your bag should be organized before you arrive at the checkpoint. Once you’re there, let the actual screening procedure determine what comes out.
That approach works better than trying to predict exactly what every airport, lane or scanner will require.
FAQs
1. What is the best way to pack a one-bag carry-on for TSA?
Keep liquids, electronics, documents and other frequently accessed items in predictable, accessible locations. Pack clothing and less frequently used items deeper in the bag. Follow the instructions at your specific TSA checkpoint rather than assuming every lane uses the same procedure.
2. Do I have to take my laptop out of my carry-on at TSA?
Not always. Laptop-removal requirements can vary by screening procedure and checkpoint. TSA PreCheck travelers generally keep laptops in their bags, while other travelers may receive different instructions. Follow the instructions given at your screening lane.
3. Can I put a power bank in my carry-on?
Yes. Spare lithium batteries and power banks must be carried in cabin baggage rather than checked baggage under FAA guidance. Capacity restrictions and airline-specific requirements can apply, particularly to larger batteries.
4. How should I pack liquids for airport security?
For ordinary carry-on liquids, use containers of 3.4 ounces (100 mL) or less and place them in a single quart-size bag under the TSA 3-1-1 framework. Certain medical and other qualifying liquids can receive exceptions, so check TSA guidance when carrying special items.
5. Does TSA PreCheck change how I should pack a one-bag carry-on?
It can. TSA PreCheck generally permits eligible travelers to keep shoes, belts, light jackets, laptops and compliant liquids in their bags, although screening instructions can still vary. A well-organized carry-on remains useful even when fewer items need to be removed.
Conclusion
A well-packed one-bag carry-on should make airport security simpler, not more complicated. Keep liquids and electronics accessible, separate travel documents and small valuables, protect spare batteries, and avoid overloading the main compartment.
Most importantly, don’t treat one TSA procedure as universal. Screening technology, lane type and traveler status can change what you need to remove. Build an organized bag, arrive prepared, and follow the instructions at the checkpoint in front of you.
That combination gives one-bag travelers a practical system that remains useful even when airport procedures change.
1 comment