
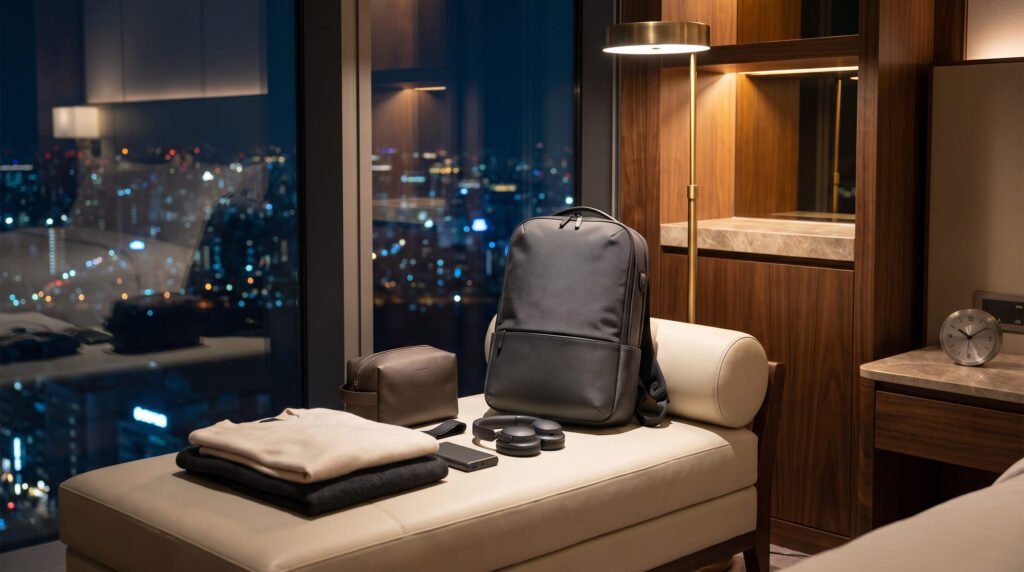
Packing for a trip does not have to consume an entire evening. If your travel essentials already have a system, you can often assemble a well-organized carry-on in about 15 minutes without rushing, forgetting essentials, or stuffing your bag with things you will never use.
The secret is not packing faster. It is making fewer decisions while you pack.
A reliable 15-minute packing routine starts before the suitcase or travel backpack comes out. You need a repeatable packing list, a small collection of ready-to-go travel essentials, a sensible clothing strategy, and a final check that catches the items most likely to be forgotten.
This guide explains exactly how to pack in 15 minutes, what to prepare beforehand, how to divide the time, what slows packing down, and when 15 minutes is simply not realistic.
Can You Really Pack a Carry-On in 15 Minutes?
Yes—but there is an important qualification.
Packing an entire trip from absolute zero in 15 minutes is unrealistic for many travelers. Choosing outfits, finding toiletries, locating chargers, checking weather, doing laundry, and deciding what to bring are separate tasks.
A 15-minute packing routine works best as a final assembly system.
Think of it this way:
- Before packing day: make the decisions.
- During the 15 minutes: execute the decisions.
- After the trip: reset the system for next time.
Once those steps become habitual, packing becomes considerably faster and less stressful.
The Secret to Fast Packing: Remove Decisions
Most packing time disappears into small decisions.
Should you take another shirt? Do you need two pairs of jeans? Where is the charging cable? Which toiletries need refilling? Will these shoes work for dinner? Should you bring a jacket?
The solution is to create default answers.
Your fast-packing system should have:
- A standard travel wardrobe
- A fixed number of shoes
- A permanent electronics pouch
- A ready-to-go toiletry kit
- A master packing list
- A dedicated place for travel documents
- A simple rule for trip-specific additions
The goal is not to own more travel gear. It is to make the things you already use predictable and easy to locate.
Build Your Always-Ready Travel System
Before trying to pack in 15 minutes, spend some time creating the infrastructure that makes the routine possible.
Create a Master Packing List
Build one master list for your typical trips rather than starting from a blank page every time.
Divide it into categories:
Clothing
- Tops
- Bottoms
- Underwear
- Socks
- Sleepwear
- Lightweight layer
- Weather-specific outerwear
Shoes
- Main walking shoe
- Optional second pair
- Activity-specific footwear when genuinely necessary
Toiletries
- Toothbrush
- Toothpaste
- Skincare
- Deodorant
- Hair products
- Shaving or grooming essentials
- Medication and personal care items
Technology
- Phone charger
- Charging cable
- Power bank
- Laptop or tablet if needed
- Headphones
- Universal adapter for international travel when required
Travel essentials
- Passport or identification
- Wallet
- Travel documents
- Keys
- Sunglasses
- Small personal-item essentials
Then create a smaller trip-specific section for anything unusual, such as hiking equipment, formal clothing, swimwear, or cold-weather layers.
Keep Travel-Specific Kits Together
A dedicated electronics pouch can save several minutes by eliminating the search for individual cables.
The same applies to toiletries. Instead of collecting products from the bathroom every time, keep your travel-sized essentials together and replenish them after returning home.
A permanent travel kit should not mean blindly leaving everything packed forever. Check expiration dates, recharge electronics, replace depleted products, and remove anything that should not travel on the next trip.
Give Everything a Permanent Home
The fastest packers are rarely faster because they move more quickly.
They are faster because they know where everything is.
Keep your:
- Passport holder
- Packing cubes
- Toiletry bag
- Electronics pouch
- Laundry bag
- Travel adapter
- Small accessories
in predictable locations.
When every item has a home, packing becomes assembly rather than searching.
The 15-Minute Packing Workflow
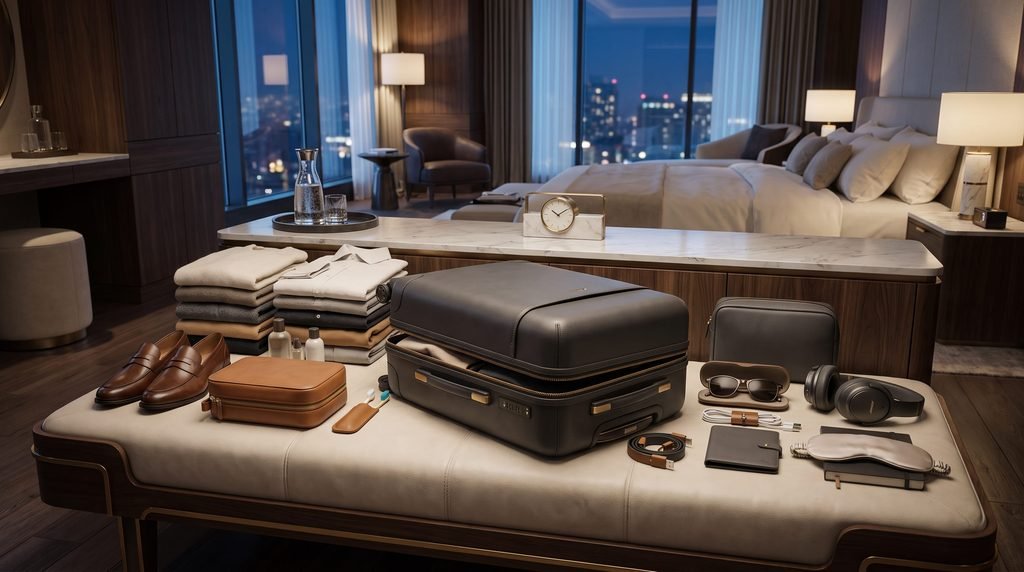
Once your system is prepared, use a timer and follow the same sequence every time.
The exact timing will vary by traveler and trip, but this framework keeps the process focused.
Minutes 0–2: Open the Bag and Create Your Packing Zone
Place your carry-on or travel backpack on a bed, luggage bench, or other clear surface.
Open every relevant compartment.
Before putting anything inside, gather your main packing categories nearby:
- Clothing
- Shoes
- Toiletries
- Electronics
- Documents
- Trip-specific items
Do not start wandering around the house collecting random objects.
Your goal during these first two minutes is to create a visible staging area and make sure you know what belongs in the bag.
Minutes 2–6: Pack Your Clothing
Clothing normally represents the largest part of a carry-on, so handle it as one deliberate batch.
Use your master list rather than choosing outfits from scratch.
A practical short-trip wardrobe might revolve around interchangeable pieces that can be worn in multiple combinations.
Think in terms of:
Base layers + versatile bottoms + one or two layers + appropriate footwear
rather than:
One completely different outfit for every day.
For example, a neutral color palette can allow one pair of trousers or jeans to work with several tops. A lightweight overshirt or jacket can provide another layer without requiring an entirely separate outfit.
Use the 3-Question Clothing Test
Before adding an item, ask:
- Will I realistically wear it?
- Can it work with at least two other pieces?
- Would I regret leaving it at home?
If the answer is weak across all three, leave it out.
This is especially useful when packing quickly because it prevents “just in case” additions from multiplying.
Minutes 6–9: Add Shoes and Accessories
Shoes can consume disproportionate amounts of space.
For most carry-on trips, start with the shoes you will wear during transit and add another pair only when the itinerary justifies it.
Pack shoes toward the edges or base of the bag where their shape can be accommodated efficiently.
Use the interior space of suitable shoes for small, clean items such as rolled socks or accessories when practical.
Then add:
- Belt
- Sunglasses
- Jewelry
- Watch
- Hat
- Small accessories
Keep delicate valuables protected and accessible rather than burying them beneath clothing.
Minutes 9–12: Pack Toiletries and Electronics
This is where a prepared system makes the biggest difference.
Your toiletry kit should already contain the products you normally travel with. Your electronics pouch should already contain the cables and accessories you need.
Place the items into the bag without reopening every pouch and reconsidering every product.
Keep Airport-Sensitive Items Accessible
For U.S. airport screening, TSA generally limits carry-on liquids, gels, aerosols, creams, and pastes to containers of 3.4 ounces / 100 mL or less, subject to applicable exceptions.
If you are flying through the United States, keep your liquids organized so you can follow the screening instructions applicable to your trip.
Do not assume that every country or airport uses identical procedures. Check the relevant airport, security authority, and airline before departure.
Pack Electronics Intentionally
Keep essential electronics together rather than distributing chargers throughout the bag.
For flights, pay particular attention to spare lithium batteries and power banks. FAA guidance says spare lithium batteries and power banks must be carried in carry-on baggage, not checked baggage, and airlines may impose stricter restrictions.
If your carry-on is taken at the gate and placed in the aircraft’s hold, remove spare batteries and power banks and keep them with you in the cabin.
Minutes 12–14: Add Documents and Trip-Specific Items
Now add the items that depend on this particular trip.
Examples include:
- Passport
- Identification
- Hotel information
- Event clothing
- Swimwear
- Hiking layer
- Camera
- Destination-specific adapter
- Prescription or personal-care items
- Small work equipment
Keep the things you will need during transit in your personal item or another easily accessible compartment rather than burying them in the main bag.
This is also the point to remove anything that accidentally made its way into the staging area but does not belong on the trip.
Minutes 14–15: Perform the Final Audit
Stop packing.
Do not keep adding things.
Run a quick mental checklist:
Travel documents — passport/ID, wallet, tickets or essential confirmations
Technology — phone, charger, required cables, power bank
Personal essentials — medication, glasses, toiletries
Clothing — enough for the actual itinerary
Weather — appropriate layer or rain protection
Keys — home, car, or other essential keys
Bag — fully closed, comfortable, and within the applicable airline requirements
Then close the bag.
That final minute is not for finding more things to pack. It is for catching omissions.
How to Pack Clothes Quickly Without Overpacking
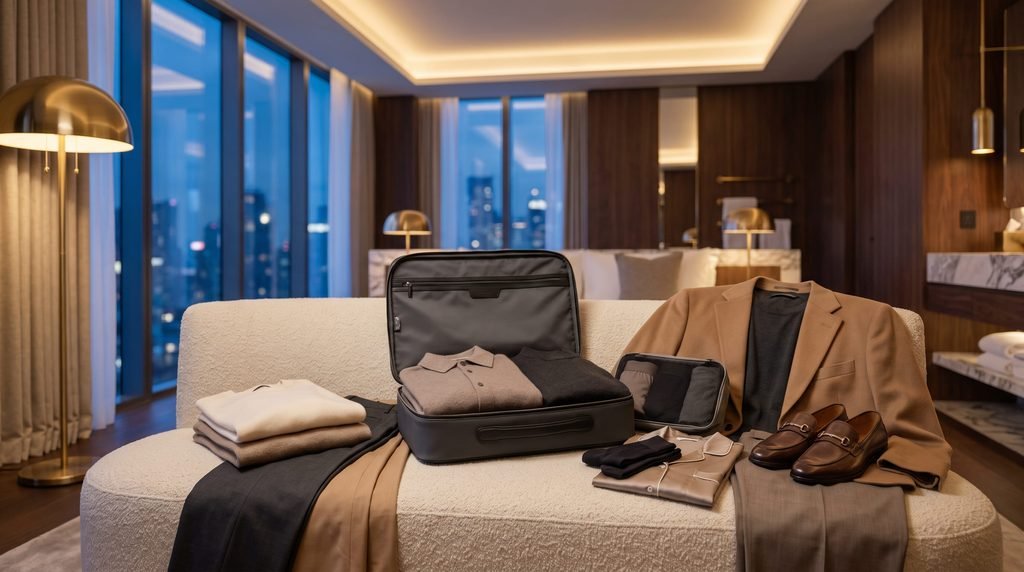
Fast packing becomes much easier when your wardrobe is built around versatility.
Instead of planning seven completely different outfits for seven days, build combinations.
A useful travel wardrobe usually has:
- A consistent color palette
- Lightweight layers
- Comfortable walking clothing
- Pieces that work across multiple settings
- Fabrics suited to the destination
- Minimal duplicate items
Pack for Activities, Not Days
This is a more efficient approach than counting one outfit per day.
Ask what you are actually doing:
- City sightseeing
- Business meetings
- Restaurant dinners
- Beach time
- Hiking
- Cold-weather activities
- Casual evenings
Then pack around those activities.
A three-day city break might require fewer clothing categories than a three-day trip involving hiking, swimming, and formal events.
Wear Your Bulkiest Practical Items
When appropriate, wear the heavier or larger items during transit.
That might mean:
- Walking shoes
- A jacket
- A sweater
- Heavier trousers
This can free valuable space inside a small carry-on.
However, comfort matters. Wearing an excessively bulky outfit simply to avoid packing it can make the journey worse.
Use One Laundry Strategy
Laundry is one of the most powerful tools in one-bag travel.
If your trip allows access to laundry, you can often reduce the number of clothing items substantially.
For longer trips, think in terms of a small rotating wardrobe rather than trying to carry enough clothing for every calendar day.
This is one reason a 15-minute packing system can work beyond short weekends: the packing list becomes based on how you travel rather than the total number of days.
How to Pack Shoes Efficiently
Shoes are heavy, bulky, and often difficult to compress.
Start with the pair you can wear for the largest number of activities.
Then ask whether a second pair genuinely solves a problem.
A second pair makes more sense when you need:
- Formal footwear
- Hiking shoes
- Sandals for a specific destination
- Specialized athletic footwear
- Weather-specific footwear
If none of those apply, two pairs may be unnecessary.
Keep shoes contained so their soles do not touch clean clothing.
How to Pack Toiletries Without Slowing Down
The fastest toiletry routine is a permanent, edited kit.
Avoid packing your entire bathroom.
Keep only the products you actually use while traveling.
Consider:
- Travel-size containers
- Solid alternatives where practical
- A compact toiletry organizer
- Minimal grooming tools
- A separate medication organization system when needed
For U.S. airport screening, TSA’s current guidance confirms that many ordinary liquids and gels in carry-on baggage must comply with the 3.4-ounce/100 mL limit, while medically necessary liquids can have different screening procedures.
If you are carrying medically necessary liquids, review the current TSA requirements before traveling rather than treating them like ordinary toiletries.
How to Pack Electronics Without Creating a Cable Mess
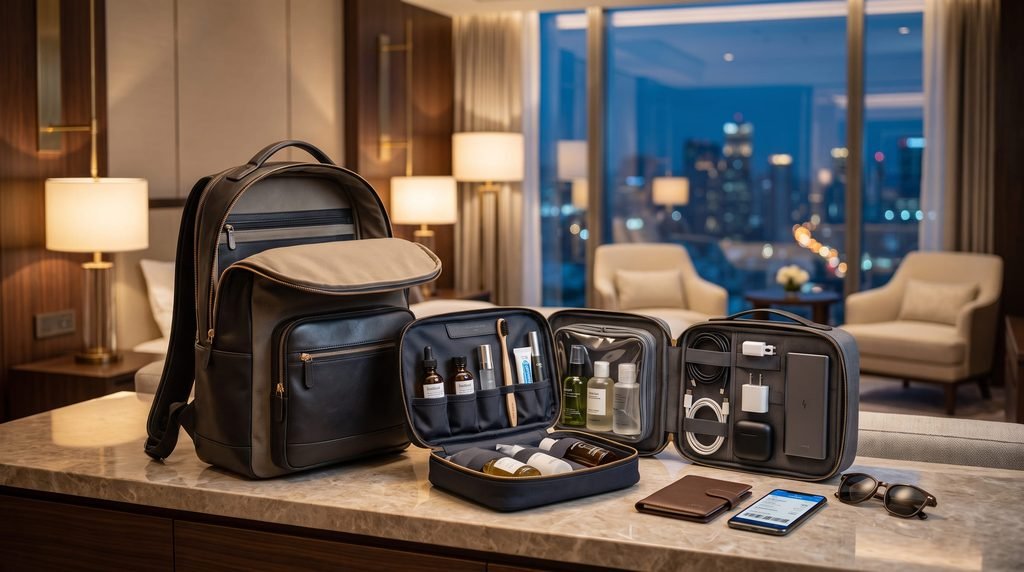
Electronics become a time-consuming category when every device has a separate cable and adapter.
Use one dedicated pouch and organize it around your actual travel needs.
A typical setup might include:
- Primary charging cable
- Wall charger
- Power bank
- Headphones
- Laptop or tablet charger when required
- Destination-specific adapter
Do not automatically pack every cable you own.
Follow the One-Cable Test
For each cable, ask:
Which device will use this?
If you cannot answer immediately, it probably does not belong in the travel pouch.
For air travel, remember that spare lithium batteries and power banks have specific baggage requirements. FAA guidance currently states that spare lithium batteries and power banks must remain in carry-on baggage, while airline rules can be more restrictive.
The Biggest Things That Slow Packing Down
If packing consistently takes an hour, the problem is probably not your folding technique.
It is usually one of these:
1. Choosing Every Outfit From Scratch
A repeatable wardrobe removes this decision.
2. Searching the House for Chargers
Keep travel electronics together.
3. Packing Directly From the Bathroom
Maintain a travel toiletry kit.
4. Taking Too Many Shoes
Choose footwear based on actual activities.
5. Packing for Imaginary Scenarios
“Maybe I’ll need this” is one of the fastest ways to fill a carry-on.
6. Ignoring the Weather Until the Last Minute
Check the forecast before the final packing session.
7. Leaving the Bag Until Departure Morning
A 15-minute final assembly is very different from starting the entire process 15 minutes before leaving.
8. Constantly Reopening the Bag
Once an item is packed and checked against your list, move on.
Does 15-Minute Packing Work for a 7–10 Day Trip?
It can, particularly for experienced one-bag travelers.
The important factor is not simply the number of days. It is the complexity of the trip.
A 10-day city trip with laundry access and a versatile wardrobe may be easier to pack than a three-day adventure trip requiring hiking boots, technical clothing, camera equipment, and specialized gear.
For longer trips:
- Use interchangeable clothing.
- Plan at least one laundry opportunity when practical.
- Limit footwear.
- Avoid duplicate electronics.
- Build around layers.
- Separate genuinely necessary equipment from optional equipment.
The more specialized the trip, the more preparation should happen before the 15-minute packing window.
When 15 Minutes Is Not Enough
There are situations where you should not force the system.
Give yourself more time for:
- International trips requiring extensive documentation
- Cold-weather travel
- Business trips with formal clothing
- Adventure travel
- Trips involving children
- Specialized sports equipment
- Medical equipment
- Long trips without laundry
- Multi-climate itineraries
- First-time travelers building their system from scratch
The goal is efficiency, not an artificial deadline.
If your trip genuinely requires 30 minutes of preparation, taking 30 minutes is better than rushing and forgetting something important.
How to Build a 15-Minute Packing System From Scratch
If you currently have no system, do not try to create one five minutes before departure.
Build it once.
Step 1: Empty Your Current Travel Bag
Remove everything.
Separate permanent travel items from things that accumulated accidentally.
Step 2: Create Your Core List
Identify what you normally need on most trips.
Step 3: Build Three Core Kits
Create:
Clothing system
Your repeatable travel wardrobe.
Toiletry system
Your edited travel toiletries.
Technology system
Your essential chargers, cables, adapters, and power accessories.
Step 4: Test-Pack
Pack everything as if you were leaving tomorrow.
Then check:
- Does the bag close comfortably?
- Is anything unnecessary?
- Are heavy items positioned sensibly?
- Can you reach essential items?
- Does the bag meet the airline’s published size and weight requirements?
Do not assume that one carry-on dimension works for every airline. Airlines can impose their own baggage requirements, and FAA guidance specifically advises travelers to check with their airline because rules can be stricter than general regulations.
Step 5: Time Yourself
Once the system is ready, perform the complete packing routine with a timer.
Your first attempt may take 25 or 30 minutes.
That is normal.
The objective is to identify the decisions slowing you down.
Step 6: Simplify
If you repeatedly hesitate over an item, make a permanent decision.
Either it belongs on the standard list—or it does not.
The Five-Minute Post-Trip Reset
One of the most overlooked parts of fast packing happens after the trip.
When you return:
- Remove dirty laundry.
- Empty the bag.
- Return reusable travel items to their storage locations.
- Refill toiletries.
- Recharge travel electronics.
- Remove destination-specific items.
- Replace anything that ran out.
- Update the packing list only if you learned something useful.
This means your next trip begins with a system that is already functional.
Instead of rebuilding everything, you simply adjust it.
A Simple 15-Minute Packing Checklist
Save this sequence for your next trip:
0–2 minutes
- Open bag
- Create staging area
- Gather categories
2–6 minutes
- Pack clothing
- Add underwear and socks
- Add layers
- Remove unnecessary extras
6–9 minutes
- Add shoes
- Add accessories
- Protect delicate items
9–12 minutes
- Pack toiletries
- Add electronics
- Check liquids
- Keep battery-sensitive items appropriately accessible
12–14 minutes
- Add passport/ID
- Add trip-specific items
- Move transit essentials to your personal item
14–15 minutes
- Weather check
- Keys
- Phone
- Wallet
- Medication
- Chargers
- Bag closure
- Airline requirements
Then stop.
Who This 15-Minute Packing Method Works Best For
Frequent Travelers
This is where the system delivers the biggest benefit. Repeated trips make a standardized packing routine increasingly valuable.
One-Bag Travelers
A limited amount of luggage naturally encourages a more repeatable wardrobe and organization system.
Business Travelers
A fixed business-travel kit can make short trips significantly easier to assemble.
Weekend Travelers
Short trips are ideal for a highly standardized packing list.
First-Time Travelers
The system can also help beginners, but they should spend more time preparing the first few packing lists rather than trying to achieve 15 minutes immediately.
FAQs
1. Can you really pack a carry-on in 15 minutes?
Yes, if the packing list, toiletries, electronics, and travel essentials have already been organized. The 15-minute target is best understood as a final packing workflow rather than creating an entire travel plan from scratch.
2. What should I pack first when I am short on time?
Start with clothing, then shoes and accessories, followed by toiletries and electronics. Finish with documents and trip-specific items, then use the final minute for a checklist rather than additional packing.
3. How do I pack quickly without overpacking?
Use a fixed master list, choose interchangeable clothing, limit shoes, and remove items that only solve hypothetical situations. Packing for activities rather than assigning a completely different outfit to every day also reduces unnecessary items.
4. How can I make packing faster for every trip?
Create permanent travel kits for toiletries and electronics, store packing equipment together, maintain a repeatable wardrobe, and reset everything after each trip. The more decisions you remove before departure, the faster the final packing process becomes.
5. Can I use this method for a 7- or 10-day trip?
Yes, particularly when you use a versatile wardrobe, minimize footwear, and plan for laundry when appropriate. However, specialized trips, extreme weather, formal clothing, or bulky equipment can require considerably more preparation.
Conclusion
Learning how to pack in 15 minutes is less about becoming a faster packer and more about building a better system.
Keep your travel essentials organized, use a repeatable wardrobe, maintain dedicated toiletry and electronics kits, check trip-specific requirements before packing, and follow the same sequence every time. Once the decisions have already been made, the final 15 minutes become a straightforward assembly process.
The best packing system is not the one that fits the most into a bag. It is the one that lets you leave home with everything you genuinely need—and very little you do not.